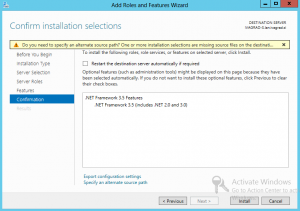
For all of us, who used SBS with companyweb SharePoint site, which was not really “best practice installed”, but worked well, I want to discuss how to install SharePoint on Essentials server 2012. As on SBS, I don’t want to use best practices, because we have a limited number of users and I will use only one administrator account to run all SharePoint services. Installation is not so difficult, but you have to know some tricks to be successful. In addition, I want to thank Robi Vončina (SharePoint Server MVP) for the help with PowerShell scripts. You will need also the SQL Server 2012 Express. You can download it here http://www.microsoft.com/en-us/download/details.aspx?id=35579, but this installation is not a part of this post. There is also an additional requirement: you must have a static IP address on the Essentials 2012 server. The first think that I suggest you to do is to manually install .Net framework 3 (you have to install it using Server Manager console): On Windows Server Essentials open Server Manager console and select Add Roles and Futures. Click on Next 4 times and when you will arrive into Features windows select .Net Framework features and click Next. 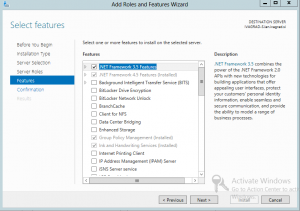 On confirmation page click on Specify an alternate source path.
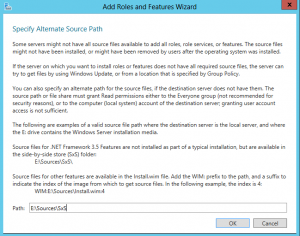
  In Specify Alternate Source Path window, under Path, type the path to the source files. Those files are located on the installation DVD, in SourcesSxS folder.
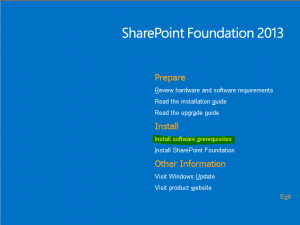
  Close the window with OK and click Install to install the feature. After the installation is complete, close the wizard. Now you are ready to install the SharePoint prerequisites by running SharePoint.exe installation file (you can download it from http://www.microsoft.com/en-us/download/details.aspx?id=35488). On the first window select Install software prerequisites. You will need internet access for downloading some components.
  When the Microsoft SharePoint 2013 Products Preparation Tool windows will open, click Next.
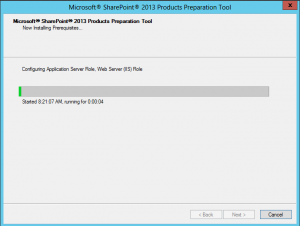
 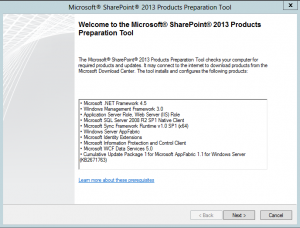 Wait the installation to complete.
  On the last page look at the results. Here you must see all the components with Installed successfully or No action taken status, before you can proceed to SharePoint Installation.
 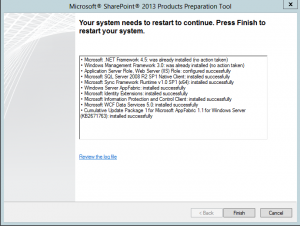 If there is all OK, restart the server and when the server is up, run the SharePoint.exe once again and click on Install SharePoint Foundation.
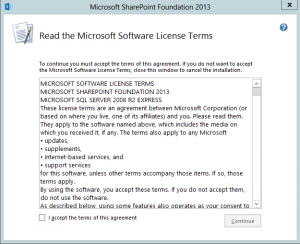
 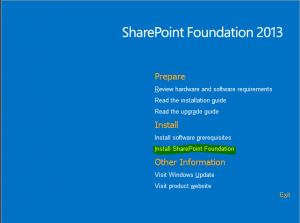 On the Welcome page, accept the license and click Continue.
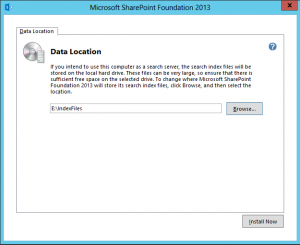
  On the next window, you are asked for data index file location. Search in SharePoint 2013 is different as in version 2010. Therefore, if you want to use this computer as a search server, you have to specify where this index files will live. Be careful because those files can become big!
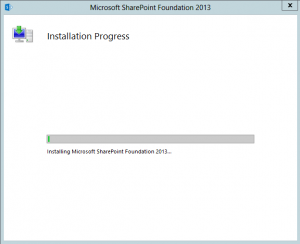
  Now you can only wait that SharePoint installation will be finished.
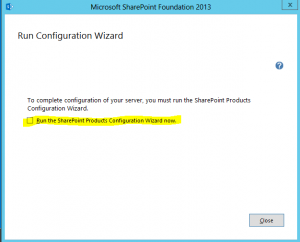
  In the end, when you will be prompted for run configuration wizard, I suggest that you configure all options manually. For me the best choice is to clear Run the SharePoint Products Configuration Wizard now and click on Close.
  At this point it is time to switch in PowerShell – SharePoint 2013 Management Shell and run it as Administrator. Don’t be surprised for the message, that SP farm is not available – it is not jet configured.
 ![]() Here is the first script for initialling SharePoint configuration:
Here is the first script for initialling SharePoint configuration:
<##### Initial SharePoint Configuration #####>
$dbserver=”ServerNameInstance“
$configdb=”SP13_Config_Configuration“
$adminContent=”SP13_Config_AdminContent“
$pass=ConvertTo-SecureString -AsPlainText -Force “SP_AdminPass“
$user=”DomainAdmin“
$credentials=New-Object -TypeName System.Management.Automation.PSCredential -argumentlist $user,$pass
$passphrase=ConvertTo-SecureString -AsPlainText -Force “SP_AdminPass“
New-SPConfigurationDatabase -DatabaseName $configdb -DatabaseServer $dbserver -AdministrationContentDatabaseName $adminContent -Verbose -Passphrase $passphrase -FarmCredentials $credentials
$bindingInfo=Get-SPTopologyServiceApplication | select URI Set-SPFarmConfig -ServiceConnectionPointBindingInformation $bindingInfo
$caPort = 55555
$caAuthProvider = “NTLM”
New-SPCentralAdministration -Port $caPort -WindowsAuthProvider $caAuthProvider
Install-SPHelpCollection -All Initialize-SPResourceSecurity
Install-SPService
Install-SPFeature -AllExistingFeatures Install-SPApplicationContent
Write-Output “Starting Central Administration” & ‘C:Program FilesCommon FilesMicrosoft SharedWeb Server Extensions15BINpsconfigui.exe’ -cmd showcentraladmin
<##### Initial SharePoint Configuration #####> 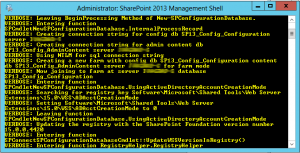 With the script we created all the databases needed in Central Admin page, we added our user as SP administrator, we set the Central Admin port and Authentication and in the end we started the Central admin page. Take it in mind, that all users used in any SharePoint administration role must have created local profiles (you must login with that user or create a script for creating this folders).
After this step is completed, you have to run the second script:
<##### Create WebApplication and Site #####>
$ap = New-SPAuthenticationProvider
New-SPWebApplication -Name Companyweb -ApplicationPool “CompanywebAppPool” -ApplicationPoolAccount (Get-SPManagedAccount domainAdmin) -HostHeader Companyweb -Port 80 -Url http://Companyweb -DatabaseName SP13_Companyweb -Verbose
New-SPSite -Name Companyweb -Url http://Companyweb –HostHeaderWebApplication / -Template TeamSite -OwnerAlias domainadmin -ContentDatabase SP13_Companyweb -Verbose
<##### Start the service instances #####>
Start-SPEnterpriseSearchServiceInstance $env:computername
Start-SPEnterpriseSearchQueryAndSiteSettingsServiceInstance $env:computername $serviceAppName = “Search Service Application”
$appPool=Get-SPManagedAccount -Identity “DomainAdmin“
New-SPServiceApplicationPool -Name SA_AppPool -Account $appPool -Verbose
$saAppPool=Get-SPServiceApplicationPool -Identity SA_AppPool
$svcPool = $saAppPool
$adminPool = $saAppPool
$searchServiceInstance = Get-SPEnterpriseSearchServiceInstance –Local
$searchService = $searchServiceInstance.Service
$bindings = @(“InvokeMethod”, “NonPublic”, “Instance”)
$types = @([string], [Type],
[Microsoft.SharePoint.Administration.SPIisWebServiceApplicationPool],
[Microsoft.SharePoint.Administration.SPIisWebServiceApplicationPool])
$values = @($serviceAppName,
[Microsoft.Office.Server.Search.Administration.SearchServiceApplication],
[Microsoft.SharePoint.Administration.SPIisWebServiceApplicationPool]$svcPool,
[Microsoft.SharePoint.Administration.SPIisWebServiceApplicationPool]$adminPool)
$methodInfo = $searchService.GetType().GetMethod(“CreateApplicationWithDefaultTopology”, $bindings, $null, $types, $null)
$searchServiceApp = $methodInfo.Invoke($searchService, $values)
$searchProxy = New-SPEnterpriseSearchServiceApplicationProxy -Name “$serviceAppName Proxy” -SearchApplication $searchServiceApp
$searchServiceApp.Provision()
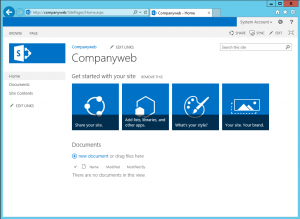
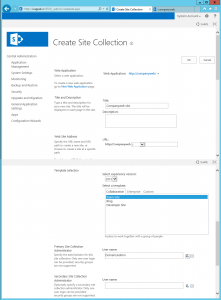
This script will create SharePoint Web Application and SharePoint Site companyweb with TeamSite template. After this script will be completed I recommend checking if all Application are in running state in IIS and if the site is really created. In some cases this two things are not a 100% true (maybe you will have to manually start some services and manually create the companyweb site).
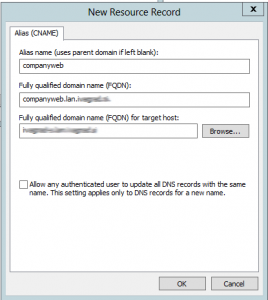
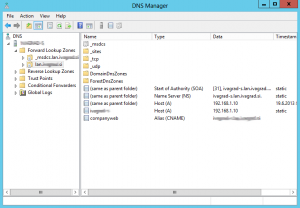
Now you have to do the final steps. You need to add a CNAME DNS record for companyweb and target it to the server name.
Now you can browse your SP site and in management you have to define permissions for users.
This is all the work for build up your SharePoint site on Essentials server. All other settings are optional and same as described in many blogs.
 You can download scripsts here: SharePointInstall.
 4 comments found on “
Elvis, have you tried this using WSE 2012 R2?
What would be necessary to make it work?
Yes, I try it. It is the same think that in 2012.
It’s work.
I got what you mean,saved to bookmarks, very decnt site.