In my environments, I use MDT and/or WDS in many cases. Here is always the problem of updating images, because it takes a lot of time. For this reason, I was looking for a script, which would do the same work as I, but without losing my time.
Imagepatcher PowerShell script from CodePlex (http://imagepatcher.codeplex.com) was the perfect solution for me, but not in the last months. I think that the problem occurred after I upgraded my environment to Windows Server 2012, but I am not sure. Anyway, when I tried to execute the script, I received the error that there is something wrong with the saving of downloaded files. I analyzed the script and found that something is not working properly when combining the name from few variables.
I repaired the issue and you can download the new imagepatcher.ps1 from here.
Tag: MDT
Replacing OS image in MDT 2012
Days ago I had a problem on one of MDT”s. There were installed OS images for some Windows 7 systems without SP1. Because I use the ImagePatcher PowerShell script to offline update all images, and there is no way to install SP1 with offline updating, I tried to delete the images and update new ones directly from DVD.
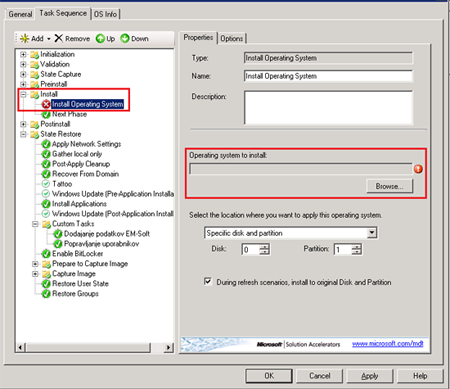
In that moment I had a problem with task sequences, because they lose OS images to install.
This problem can be solved very easy, with few clicks. You must open the desire task sequence and go to the tab Task sequence. You can find there the task “Install operating system”. In this task you have just to browse the right system you want to install.
How to enable the DaRT functionality in the MDT 2012
In the MDT version 2012 is possible to integrate the DaRT in boot images, created in MDT. This functionality is native, but some additional steps must be done.
For the first thing you have to download the Microsoft Desktop Optimization Pack 2011 R2 from Microsoft TechNet and install the DaRT on your computer. Of course you need a x32 and x64 computer if you want to use both versions, 32 and 64bit version. When you will install the DaRT, you will install also the DaRT Remote Connection Viewer and you can use it for later connections to other computers.
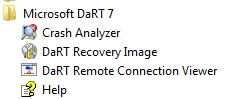
The second step is to copy the file Tools.cab from the folder C:Program FilesMicrosoft DaRT 7v7 to the server folder Deploytoolsx64 or (and) x86, where Deploy stands for Deployment Share path. I’ve attached both tools.cab files if you don’t want to install the DaRT on your computer, or you don’t have 32 and 64 bit versions of OS. You just rename both tools32.cab and tools64.cab to tools.cab, after copying them on the server.
At this point most is done. You have to restart the MDT console if it is open,then you must go to deployment share properties,and check the DaRT integration on WinPE tab.
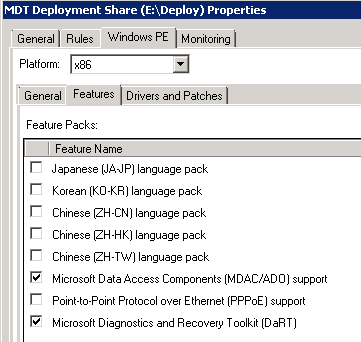
Be sure, that you enable the checkbox on both versions.
The last thing to do is rebuild the boot images and import them into WDS and other boot devices.
Upgrade from MDT 2010 to MDT 2012
Now is available a new version of MDT and of course there are new functionalities and new options. For this reason it is normal to upgrade it. There is no support to direct upgrade, but is very easy to upgrade it.
For the first thing, you have to uninstall the old version. You can uninstall it with default options, but be careful with deployment shares. You will need them in the future.
The second thing is a normal installation of MDT 2012. Then you have to start it. There you will see (or you will be able to import) all deployment shares, but they are not yet functional. They need to be upgraded.
Right click to any share and select the option upgrade. The share will be now present normally to the MDT and you will probably think that everything is OK, but if you try to use it, you will have problems. This is because you are still using the old boot image and this is the last step you have to do. You must rebuild all boot images and change them in WDS and other boot devices. I suggest, that in this step you select “Completely regenerate image”. You must have in mind that the version of MDT is changed and there are possible a lot of differences in the boot images.
That’s all. Make it a good use..
MDT 2010 Things to have in mind
The first thing we must know is if we would like to install systems for other customers, is the page with the KMS Client keys. Here are listed all the keys needed for installing systems without prompting to type them (but we will have to change them later).
The second good thing to do is updating images. This is simple to do with ImagePatcher, which is a free download PowerShell script from CodePlex. It is also easy to use, all we must to do is open PowerShell as Administrator and run ImagePacher script in this mode is to type:
imagepatcher.ps1 -dbg:yes -imagefile:”E:DeployOperating SystemsWindows 7 x86sourcesinstall.wim” -patchimages:”all”
Of course the ImageFile parameter depends on your deployment share path.
The third thing is the Administrator account. I can’t see the reason why is it there (I know, that is DISABLED in Windows 7 by default). After I saw this, I wrote a PowerShell script, which disables Administrator account and creates a new account for administration with password. The script is available to download here (attachment).
The fourth thing is usable if you want to update installations with WSUS and this computer will leave your organization. In this case you must correct some values in the registry:
HKEY_LOCAL_MACHINESOFTWAREPoliciesMicrosoftWindowsWindowsUpdate
Set parameter UseWUServer to 0.
