Step-by-step DC migration from SBS 2003 to Essentials 2012R2

Almost all of us, administrators of SBS servers, did a migration from one version to another several times. But in this moment we have at least two problems: SBS doesn’t exist anymore (and we have to do a hybrid deployment) and the new situation – the Essentials server 2012R2 doesn’t have a migration mode. So, I decided to write a blog how to migrate the SBS 2003 AD to the Essentials Server 2012R2 step by step.

Maybe in this steps there is a restart that is not really necessary, but please, do it. This is the only way that grants you success to migrate the AD and finally install the Essentials role successfully. Take your time and go through this steps:


  • Start with uninstalling or disabling features of the SBS 2003. The first thing to do is to uninstall the ISA server (if it is installed – not covered in this article) and run the Connect to internet wizard again.
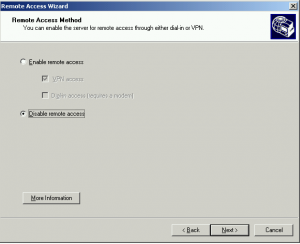
  • Restart the SBS Server. If you have enabled the VPN, run the Configure Remote Access Wizard and disable the VPN access. Don’t forget it! You will not be able to disable it later!SBS_Mig1
  • Shutdown the SBS Server and remove the second NIC (the NIC that is connected to Internet).
  • Add the router to the network and configure the port redirection (for now to the SBS server – you need this step because you must receive E-Mails, grant remote access,…Do not forget to forward ports 80, 443, 25 and 987 – not covered in this article).
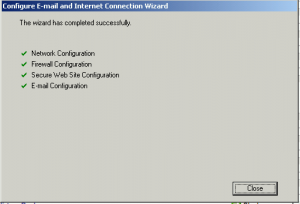
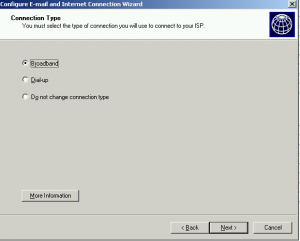
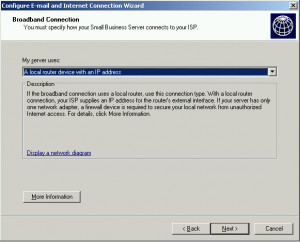
  • Start the SBS Server and run the Connect to Internet Wizard again:
    • Select the Broadband connection.SBS_Mig2
    • From the dropdown menu select I have a router device with an IP address.SBS_Mig3
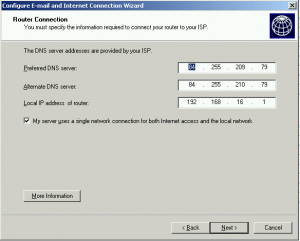
    • Add DNS names from your ISP and the gateway address (the IP of the router).SBS_Mig4
    • Finish the wizard with defaults settings.SBS_Mig5
  • From C:\Windows\Sysvol\Sysvol\DomainName\scripts delete the SBS_LOGIN_SCRIPT.bat file. This file is present in any SBS user as logon script and you have to delete it from all of the users as well.
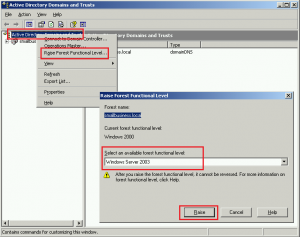
  • Form the Start Menu > Administrative tools, start the Active Directory Domains and Trusts. In the left panel, right click on Active Directory Domains and Trusts and select Raise Forest Functional Level. Raise the forest level to the Windows Server 2003 version.SBS_Mig6
  • Restart the SBS Server.
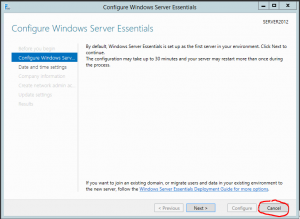
  • On the Essentials server, on the Configure Windows Server Essentials wizard, press Cancel.SBS_Mig8
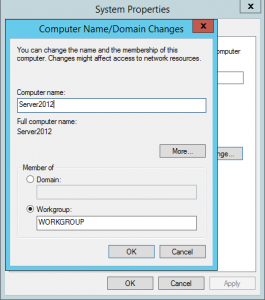
  • Open the Control Panel > System and Security > System and change Computer name. Leave the compute member of workgroup. Be careful: you have to rename the computer in this step, you cannot rename it after the Configure Windows Server Essentials wizard is finished.SBS_Mig9
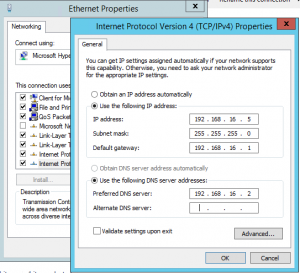
  • My suggestion: From Start > Run type ncpa.cpl, right click on the network connection. Select properties and configure the static IPv4 address. As a DNS server, add a SBS Server IP address.SBS_Mig10
  • Restart the Essentials Server.
  • Open the Server Manager (not Dashboard!) and select Add roles and features. In the Add Roles and Features Wizard, install the Active Directory Domain Services role.
  • Restart the Essentials server.
  • On the Configure Windows Server Essentials wizard, press Cancel again and start the Server Manager again.
  • From Server Manager > Notifications (up right corner) run Promote this server to a domain controller task.
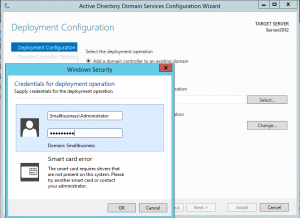
  • When the wizard is open, on the first page select Add a domain controller to an existing domain and enter the SBS admin credentials. When you will confirm this credentials, the Domain field will fill automatically. Click Next.SBS_Mig11
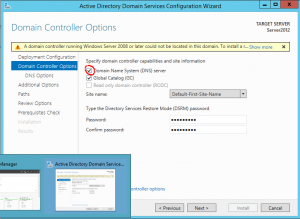
  • The next step is to enter the DSRM password (complex, 8 or more characters) and be careful to check the checkbox of the DNS server! Click Next.SBS_Mig12
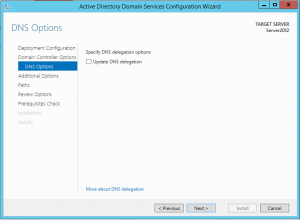
  • Clear the checkbox on Update DNS delegation and click Next.SBS_Mig13
  • In the next few steps click Next. In the Review Options check that all options are OK and click Next once again. SBS_Mig14
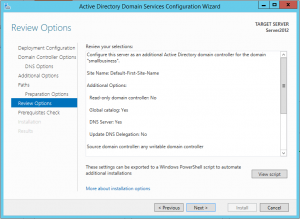
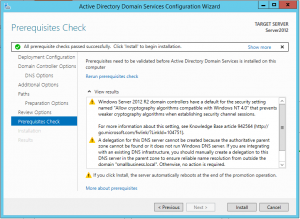
  • In the Prerequisites Check step, you will receive some warnings. This is nothing serious and you are ready to promote this server as an additional DC in the SBS domain. Click Install.SBS_Mig15
  • During the installation, the domain schema and the forest schema will be automatically upgraded. The process could take a while. After the installation is finished, the server will restart.
  • Logon to the server with the SBS administrator domain credentials.
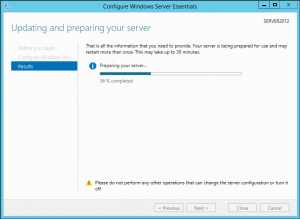
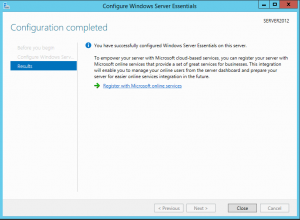
  • Complete the Configure Windows Server Essentials wizard.SBS_Mig16SBS_Mig17
  • My suggestion: Install the DHCP server on the Essentials Server. Do not use the router as DHCP server. Check forwarders in the DNS server. You have to use only the ISP DNS servers as forwarders or, if you prefer, you could not use any forwarder.

At this point, the Essentials Server 2012R2 is added as an additional DC in the SBS domain. Be careful, because you have only 21 days to complete the migration and you still have a lot of work. You have to transfer all the shared folders data, the Exchange mailboxes, the SharePoint data,… Please do not forget to control and change some settings on the GPO. Remove some GPO (some are set strictly for the SBS).

Be aware, that all workstations have to be added to the “new” domain once again true the connect site.

Be careful also when you will turn off your old server. You cannot just turn it off. You have to uninstall at least the Exchange and the DC role, but I prefer to uninstall all the installed roles, remove the server from the domain (make it part of a workgroup) and after this I turn it off.

Please let me know if you want me to write additional blog posts on migrating other functionalities of SBS..
How to transfer all FSMO roles to a different server

In any AD there are five FSMO roles. Two are unique for the entire forest and three are for any domain. If you have a smaller environment, with only one domain in the forest, this domain hosts all five roles. If you have to change DCs, then you have to transfer all five FSMO roles to new servers. Here are all the steps how to transfer all roles, one by one.

At the beginning, you have to be sure, that the replication between all DCs is working well. You can check this with Active Directory Replication Status Tool .

Now, if it is working well, you can begin with the process to transfer all AD roles to servers that you want:


  1. Open Command prompt as Administrator.
  2. To find where roles are currently hosted, type NETDOM QUERY FSMO.
  3. Now you know where the roles are situated and you are ready to begin transferring the roles. At the command prompt, type NTDSUTIL.
  4. Type ROLES.
  5. Type CONNECTIONS to enter in the connection mode.
  6. Type CONNECT TO SERVER <ServerName> (where <ServerName> is the name of the Destination Server).
  7. Type Q for leaving the server connections mode.
  8. Type TRANSFER PDC for transferring the PDC role to the connected server and then click Yes in the Role Transfer Confirmation dialog box.
  9. The same step can be done for transferring other rules.
  10. Use TRANSFER INFRASTRUCTURE MASTER for transferring the Role Infrastructure Master Role, TRANSFER NAMING MASTER for the Naming Master role, TRANSFER RID MASTER, for the RID Master and TRANSFER SCHEMA MASTER, for Schema master role.
  11. When you have done, just type Q and press ENTER until you return to the command prompt.

.

Redirecting default OU for users and computers

As you probably know, by default, newly created user or computer is placed in default OUs Computers or Users. It is not a good practice to leave them there, because we are not able to apply GPO to these OUs and in many cases, we need more OUs. The good example why to create more OUs is that we need different policy for notebooks, desktops and servers.
There is also a good practice to change default containers for users and computers to one of these newly created OUs.
It is very simple to redirect them. You have to execute two commands from Administrative command prompt:

  • For users: redirusr ou=MyDefaultUserOU,dc=domain,dc=local
  • For computers: redircmp ou=MyDefaultComputerOU,dc=domain,dc=local

If you want your environment to be even more secure, just put this default OUs in OUs that have the most restricted GPOs applied. In this way, you will limit the access to your environment..

About malware…

Frequently someone asks me for an advice which antivirus use, how to protect from the “viruses” and similar things. For this reason, I have decided to say some words about this on my blog.
A good antivirus software it is not all you need, above all, you need to control yourself. You have to avoid browsing on some not good internet pages, you have to avoid to install all software that you think “maybe will be useful”, in other words, work with computer responsibly and think of what can happen in advice.
Finally, think about all devices, that you have. It is not good to say “it is only tablet or phone”. This type of thinking has as a result a 614% grow of malware on Android devices in a year!
Also for the computer think what is going on. Now there is a Trojan malware where you have to answer on a survey!
And on “The Question” which antivirus software is good, I always avoid the response. The reason is simple: everyone of us has personal preferences and thinking. As a result of this, it is impossible to give the perfectly correct answer, but you can find Antivirus software tests here. This can give you a good view to find the right software..

Install SharePoint 2013 Foundation on Windows Server 2012 Essentials

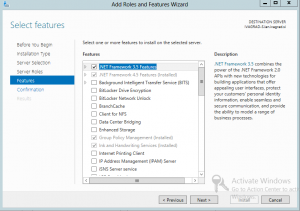
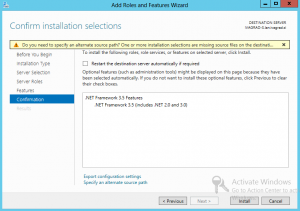
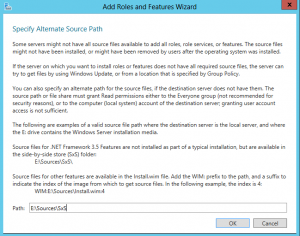
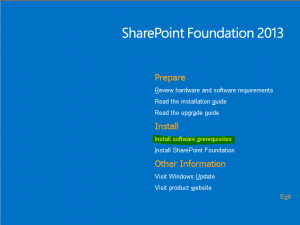
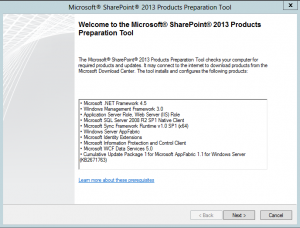
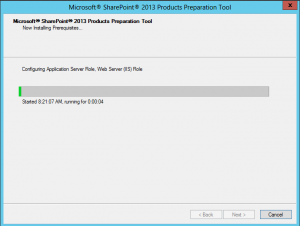
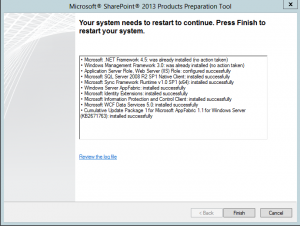
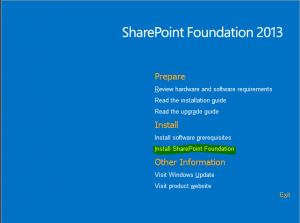
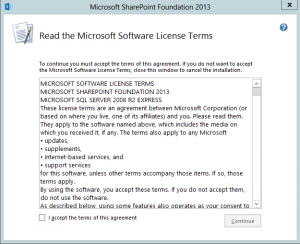
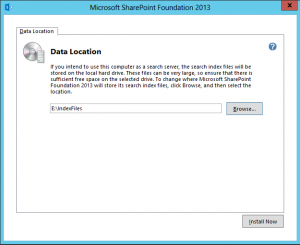
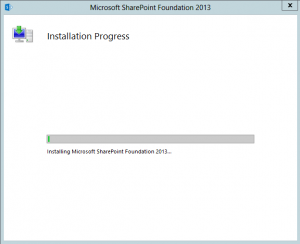
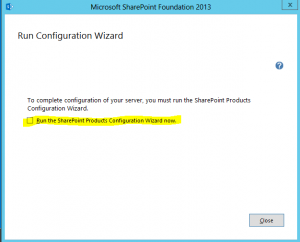
For all of us, who used SBS with companyweb SharePoint site, which was not really “best practice installed”, but worked well, I want to discuss how to install SharePoint on Essentials server 2012. As on SBS, I don’t want to use best practices, because we have a limited number of users and I will use only one administrator account to run all SharePoint services. Installation is not so difficult, but you have to know some tricks to be successful. In addition, I want to thank Robi Vončina (SharePoint Server MVP) for the help with PowerShell scripts. You will need also the SQL Server 2012 Express. You can download it here http://www.microsoft.com/en-us/download/details.aspx?id=35579, but this installation is not a part of this post. There is also an additional requirement: you must have a static IP address on the Essentials 2012 server. The first think that I suggest you to do is to manually install .Net framework 3 (you have to install it using Server Manager console): On Windows Server Essentials open Server Manager console and select Add Roles and Futures. Click on Next 4 times and when you will arrive into Features windows select .Net Framework features and click Next.  On confirmation page click on Specify an alternate source path. In Specify Alternate Source Path window, under Path, type the path to the source files. Those files are located on the installation DVD, in SourcesSxS folder. Close the window with OK and click Install to install the feature. After the installation is complete, close the wizard. Now you are ready to install the SharePoint prerequisites by running SharePoint.exe installation file (you can download it from http://www.microsoft.com/en-us/download/details.aspx?id=35488). On the first window select Install software prerequisites. You will need internet access for downloading some components. When the Microsoft SharePoint 2013 Products Preparation Tool windows will open, click Next. Wait the installation to complete. On the last page look at the results. Here you must see all the components with Installed successfully or No action taken status, before you can proceed to SharePoint Installation. If there is all OK, restart the server and when the server is up, run the SharePoint.exe once again and click on Install SharePoint Foundation. On the Welcome page, accept the license and click Continue. On the next window, you are asked for data index file location. Search in SharePoint 2013 is different as in version 2010. Therefore, if you want to use this computer as a search server, you have to specify where this index files will live. Be careful because those files can become big! Now you can only wait that SharePoint installation will be finished. In the end, when you will be prompted for run configuration wizard, I suggest that you configure all options manually. For me the best choice is to clear Run the SharePoint Products Configuration Wizard now and click on Close. At this point it is time to switch in PowerShell – SharePoint 2013 Management Shell and run it as Administrator. Don’t be surprised for the message, that SP farm is not available – it is not jet configured. Here is the first script for initialling SharePoint configuration:

<##### Initial SharePoint Configuration #####>

$dbserver=”ServerNameInstance

$configdb=”SP13_Config_Configuration

$adminContent=”SP13_Config_AdminContent

$pass=ConvertTo-SecureString -AsPlainText -Force “SP_AdminPass

$user=”DomainAdmin

$credentials=New-Object -TypeName System.Management.Automation.PSCredential -argumentlist $user,$pass

$passphrase=ConvertTo-SecureString -AsPlainText -Force “SP_AdminPass

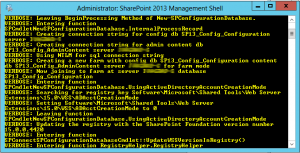
New-SPConfigurationDatabase -DatabaseName $configdb -DatabaseServer $dbserver -AdministrationContentDatabaseName $adminContent -Verbose -Passphrase $passphrase -FarmCredentials $credentials

$bindingInfo=Get-SPTopologyServiceApplication | select URI Set-SPFarmConfig -ServiceConnectionPointBindingInformation $bindingInfo

$caPort = 55555

$caAuthProvider = “NTLM”

New-SPCentralAdministration -Port $caPort -WindowsAuthProvider $caAuthProvider

Install-SPHelpCollection -All Initialize-SPResourceSecurity

Install-SPService

Install-SPFeature -AllExistingFeatures Install-SPApplicationContent

Write-Output “Starting Central Administration” & ‘C:Program FilesCommon FilesMicrosoft SharedWeb Server Extensions15BINpsconfigui.exe’ -cmd showcentraladmin

<##### Initial SharePoint Configuration #####> With the script we created all the databases needed in Central Admin page, we added our user as SP administrator, we set the Central Admin port and Authentication and in the end we started the Central admin page. Take it in mind, that all users used in any SharePoint administration role must have created local profiles (you must login with that user or create a script for creating this folders).

After this step is completed, you have to run the second script:

<##### Create WebApplication and Site #####>

$ap = New-SPAuthenticationProvider

New-SPWebApplication -Name Companyweb -ApplicationPool “CompanywebAppPool” -ApplicationPoolAccount (Get-SPManagedAccount domainAdmin) -HostHeader Companyweb -Port 80 -Url http://Companyweb -DatabaseName SP13_Companyweb -Verbose

New-SPSite -Name Companyweb -Url http://Companyweb –HostHeaderWebApplication / -Template TeamSite -OwnerAlias domainadmin -ContentDatabase SP13_Companyweb -Verbose

<##### Start the service instances #####>

Start-SPEnterpriseSearchServiceInstance $env:computername

 Start-SPEnterpriseSearchQueryAndSiteSettingsServiceInstance $env:computername $serviceAppName = “Search Service Application”

$appPool=Get-SPManagedAccount -Identity “DomainAdmin

New-SPServiceApplicationPool -Name SA_AppPool -Account $appPool -Verbose

$saAppPool=Get-SPServiceApplicationPool -Identity SA_AppPool

$svcPool = $saAppPool

$adminPool = $saAppPool

$searchServiceInstance = Get-SPEnterpriseSearchServiceInstance –Local

$searchService = $searchServiceInstance.Service

$bindings = @(“InvokeMethod”, “NonPublic”, “Instance”)

$types = @([string], [Type],

[Microsoft.SharePoint.Administration.SPIisWebServiceApplicationPool],

[Microsoft.SharePoint.Administration.SPIisWebServiceApplicationPool])

$values = @($serviceAppName,

[Microsoft.Office.Server.Search.Administration.SearchServiceApplication],

[Microsoft.SharePoint.Administration.SPIisWebServiceApplicationPool]$svcPool,

[Microsoft.SharePoint.Administration.SPIisWebServiceApplicationPool]$adminPool)

$methodInfo = $searchService.GetType().GetMethod(“CreateApplicationWithDefaultTopology”, $bindings, $null, $types, $null)

$searchServiceApp = $methodInfo.Invoke($searchService, $values)

$searchProxy = New-SPEnterpriseSearchServiceApplicationProxy -Name “$serviceAppName Proxy” -SearchApplication $searchServiceApp

$searchServiceApp.Provision()

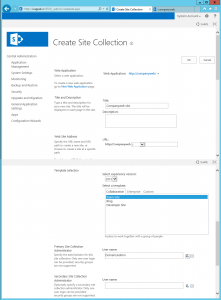
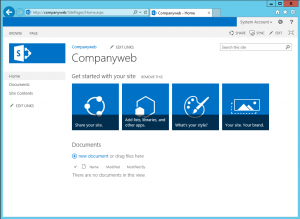
This script will create SharePoint Web Application and SharePoint Site companyweb with TeamSite template. After this script will be completed I recommend checking if all Application are in running state in IIS and if the site is really created. In some cases this two things are not a 100% true (maybe you will have to manually start some services and manually create the companyweb site).

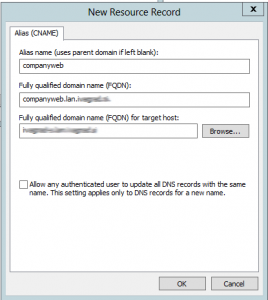
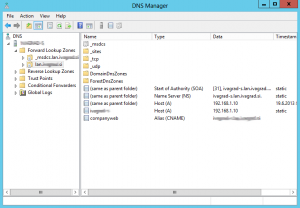
Now you have to do the final steps. You need to add a CNAME DNS record for companyweb and target it to the server name.

Now you can browse your SP site and in management you have to define permissions for users.
This is all the work for build up your SharePoint site on Essentials server. All other settings are optional and same as described in many blogs.
You can download scripsts here: SharePointInstall.