Huge Intel chip bug – some advices

On January 4th, Intel processor vulnerability was published. It is a vulnerability that affects not only Microsoft systems, but also all other systems, including iOS, Android, Linux etc.

I won’t spend the same words as you can read them in many published articles about the vulnerability and how serious it is. I just want to share two links, where is it possible to find tools / patches for Microsoft systems:
https://support.microsoft.com/en-us/help/4072698/windows-server-guidance-to-protect-against-the-speculative-execution (PowerShell must be 5.1 or higher)

http://www.essential.exchange/2018/01/04/windows-speculative-execution-client-server-patches-mitigations-detection-summary/

https://github.com/MicrosoftDocs/Virtualization-Documentation/blob/live/virtualization/hyper-v-on-windows/CVE-2017-5715-and-hyper-v-vms.md


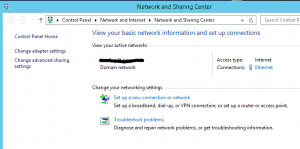
NIC Location on domain controller shows Public network

It could happen. I saw this issue couple of times, not only on domain controllers, but also on other domain joined computers.

The cause of this problem is the Network Location Awareness service. We know, that this service is recognising network location based on gateway and is trying to locate AD server thru port 389. Well, when gateway is changed or no server connection true port 389 is available, we have a new network location – by default it is Public.

Anyway, it can happened that NLA service starts before the AD services are started (or before DC is reachable on a non DC server). In this case, we will have public network profile on DC or domain joined computers. If firewall is enabled, most of network services will not run as the firewall for the Public profile is almost closed.
We have few possibilities to solve this situation. Maybe the most simple way is to restart the server, but I don’t know if I can restart the server at this moment and what was the original cause of the problem – maybe it will reappear. The second option is to disable / reenable the NIC adapter and in most cases, it will solve the issue. We will get the same result if we just restart the NLA service – this is a better way.
In some cases, you cannot connect to the computer for some reason. In this case, I use PowerShell remote session to solve the problem.

Here are the steps:
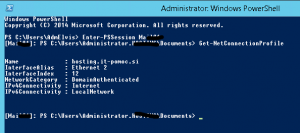
Enter-PSSession ComputerName (establish connection to computer with the problem)
Get-NetConnectionProfile (this will show you your current location profile – if this is the source of the problem, the location will not be Domain)
Restart-Service nlasvc (this cmdlet will restart NLA service; after this step you should see Domain network profile)
Get-NetConnectionProfile (just to check if the solution works)


Exit-PSSession (disconnect form the remote computer)

Based on my experience, this solution works always. Some administrators also suggest to change start option for NLA service to Automatic (Delayed Start). I am not sure if this is a good solution; be careful with it. Maybe you can do it in cases where this error is frequent (better: search for the original cause and solve the problem)

Installing Azure File Sharing

Azure File Sharing (AFS) is a new technology, currently in public preview, used for caching files or syncing file servers or cluster around the datacentres. If you want to know more about useful scenarios where to use AFS, I suggest you to read this blogpost or watch this video.
In this post, I will explain how to install AFS on a server to be synchronized with Azure. I will go thru installation of the first server, but installing agent on the second or any other server is just the same process as for the first one. Of course, you must have an active Azure subscription (you can open a trial, but this will be time limited – maybe just for testing) and a supported server OS – Windows server 2012R2 or Windows Server 2016.
First step is done in Azure. Here we have to prepare the Storage account:

  1. Login to Azure portal
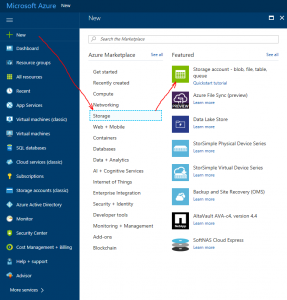
  2. On the Left side menu select +New, in Marketplace select Storage and then Storage account and click Create.
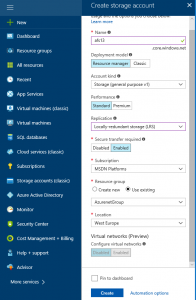
  3. Write the Name of the account, the Account kind MUST BE »General purpose« and Replication »Locally-redundant storage (LRS)«. Set Storage Service encryption and Storage Transfer required to »True«.
  4. You can create a new Resource group or use the existing one.
  5. Use one of the supported Locations. (list)

Now we have to create an Azure File Share:

  1. Navigate to Storage account that we have created previously
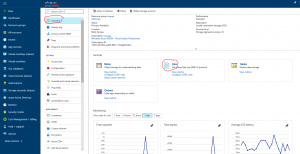
  2. In Overview find section Files and click on + File Share
  3. Write the Name and click Create.

As last, we have to create Storage Sync Service:

  1. In Azure Portal, click on +New, in search box type » Azure File Sync«, select Azure File Sync (preview) and click Create.
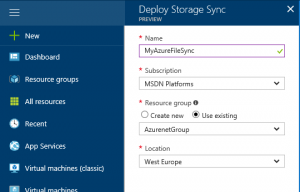
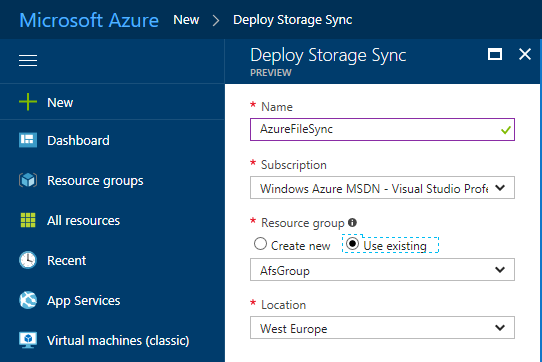
  2. Fill all fields, use the same Resource group as in Storage account and click Create.

For now, we have finished to prepare the Azure part and we will move to our on premises server. We will install Agent here and test prerequisites.
First, we have to find if our server has all that we need to install the agent:

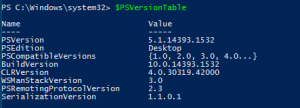
  1. We will need PowerShell version 5.1 or higher. You can check this from PowerShell with cmdlet $PSVersionTable. If PSVersion is lower than 5.1, then you must upgrade PowerShell by installing WMF 5.1 Package (install Win8.1AndW2K12R2-KB3191564-x64.msu)
  2. Install AzureRM cmdlets with installing PowerShell module: Install-Module AzureRM (Answer Yes to continue and to install from untrusted repository – it is a preview).
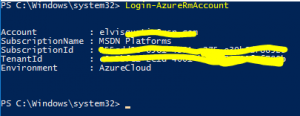
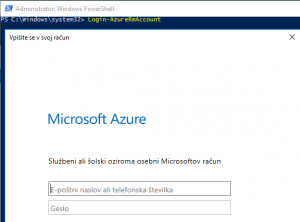
  3. Register AFS provider: Register-AzureRmResourceProvider -ProviderNamespace Microsoft.StorageSync. In case that you receive this error, run cmdlet Login-AzureRmAccount 
  4. Disable Internet Explorer Enhanced Security Configuration (you should do this because you have to login into Azure later).

Now we will install the agent on the server that we want to sync:

  1. Download agent installation from Azure portal
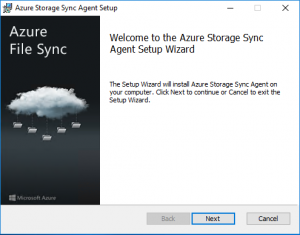
  2. Run the installation wizard
  3. On a welcome page click Next, accept the license agreement and click Next.
  4. On the Feature selection you can change the location for the files and click Next
  5. Consider using Windows Update services to update the AFS agent (it is already a part of MS Updates) and click Next
  6. Click Install
  7. After the installation is finished, the server registration will run. If this will not happen or you want to run it manually later, you can search for file ServerRegistration.exe and run it.
  8. In Server Registration, sign in to Azure with your Azure subscription (this step will open an Internet Explorer window to sign in process)
  9. Select the needed data (Subscription – if you have more than one, Resource group that you used in previous steps and Sorage sync service that you created before)
  10. Click Register.
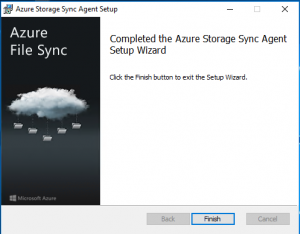
  11. After successful registration, you completed a server agent installation, server registration to AFS service.

We have now created Storage Sync Service, installed agent on our server and registered our server to created Storage Sync Service, but we haven’t yet configured the synchronization between Azure and on premises servers – so synchronization is not working in this moment.
We have to add Azure server as an endpoint in Sync Service. The easiest way to do this is in the Azure portal:

  1. Login to Azure portal
  2. Navigate to Storage Sync Service we created and in Overview click on +Sync group.
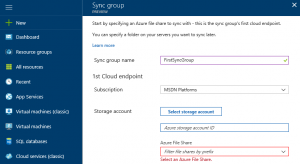
  3. Type all data and click Create.
  4. Click on Sync group you created and add Server Endpoint
  5. When you are adding server Endpoint, you have to enter FULL LOCAL PATH on the server and the percent of free disk space on local server (can be different for any server).

Done! You have now created Azure File sync and you have just to wait for the first sync. Of course, it can take some time – depends on the amount of data, but after this you will have all your files safe in Cloud. For this reason, you can use this service as a DR scenario.
If you want to add an additional server to the same AFS service, just repeat all steps that were done on the local server and register it to existing AFS account. Different server scan host locally different files (depends on usage), can be member of different domains or workgroups – so you can use this technology for some collaboration projects as well.

Windows Server 2016 may fail to boot after October update KB4041676

Some of my customers and friends had a problem: after installing KB4041676, VMs on Server 2016 didn’t boot. The problem is in update – Microsoft releases the update with a mistake and correct this update immediately the same afternoon, but in some cases the old update remained in cache on devices or WSUS servers. To be sure, that you have the right update, check this link and retrieve the right delta update.
What if you are already there and your VM is not booting?
To solve the issue, follow this steps:

  • Start the VM from the media (DVD, ISO…)
  • At the installation menu, select Repair computer and in Advanced options select Command prompt
  • In command prompt, you have to execute this commands:
    • reg load hklm\temp c:\windows\system32\config\software
    • reg delete “HKLM\temp\Microsoft\Windows\CurrentVersion\Component Based Servicing\SessionsPending” /v Exclusive
    • reg unload HKLM\temp
  • After correcting the registry, we still need to remove the update with commands:
    • Use dism /image:c:\ /get-packages to list all installed packages to check if the package is really installed
    • When you find the package, you can uninstall with command: dism /image:c:\ /remove-package /packagename:packageidentity /scratchdir:c:\temp (package identity is an identity reported in output from previous command)
  • Reboot the server

Hope it is helpful.

Azure File Services – first overview

Azure File Services (AFS) is new service in Azure, currently in public preview. From my perspective, it is a service with very strong fundamentals and a granted future.
What can we do? What are objectives? Well, we are producing more and more data every day, we are building every day new datacenters (on premise), open new corporate locations and this are all reasons why we have problems with disk space and syncing data around the world.
AFS is a technology dedicated to solve these problems and help us to have more control on our data and hardware usage. We can use AFS in various modes or combinations:

  • We can sync a server or cluster to Azure and duplicate all files from local storage to Azure – just because we want to have additional security or additional access point (Azure file share)
  • We can sync a server or cluster to reduce our hardware needs. We have locally stored only files that we use frequently; all other older files will be present only in Azure and we don’t need disk space for them. This is tiering space where we can write our rules how files will go to the cloud and they disappear from local storage. In this case, if we need a file that is present only in Azure, we can see it on local storage (grayed icon) and the file is transferred locally from Azure in a moment that we click on it – now it is located also on local storage and is under AFS rules.
  • We can sync more servers (clusters) in different datacenters across the world like DFS. Sync is done through Azure services and all files will exist on Azure (not necessary on premise), so Azure is in this case the new file store. Of course, because different locations work with different files, on premise content can (will) vary from server to server. We cannot expect that all server will have the same files stored on local storage and there will not be a point where you can find all your files together except on Azure storage.

Using this technology will change your environment, your way of thinking about some operations that are now clear and from this reason it is very important to know what and how will be impacted. For sure the most important thing that have to be changed is the backup. You have to know, that you have all files only in Azure, so backup has to be done there. If you want to do backup locally, there will be a problem because you will access to any file every time you will do a backup and those files will remain on premise – as frequently used files.
We have a nice short video for AFS. You can watch it here.

How to establish which files are good for AFS technology?
It depends from your usage, company infrastructure and of course file types. First, you have to identify files or shares. In some cases, maybe you will replace DFS technology with AFS (your users use different files in different locations and there is no need to have anywhere all files stored locally). Maybe you have a large number of old files (I am thinking about my client – advertising agency – they have really many old projects that they need to be stored in archive, but they practically never use). This are some cases where you can use ASF. You will have a good and long retention policy in Azure, you don’t need to care about backups, disk spaces … This is very important and is money value – also for an administrator.

It is difficult to establish the AFS?

No. I can say that is simpler than build some DFS infrastructures. In short, you just need to install AFS agent on server, create Storage account and AFS service in Azure and connect both ends. For few servers, you will be able to do it in few hours. But here you have to know, that synchronization will take some time and to have a complete infrastructure up to date and working, it will take longer; depend on data amount and internet bandwidth. If you will try to test it, just take your time, go slower, wait for steps to complete and you will be happy with the results.
I will write a post in few days with step by step instructions how to connect a server to AFS and make all working.
For me, this technology can be used in very small companies in one way and in large companies in another way. It is very flexible, with very large specter of usage and different solutions. I am sure that this approach is the best way to have a lot of implementations, successful stories and satisfied customers. This is what we want to do and I am sure that is done very well yet.
WP to LinkedIn Auto Publish Powered By : XYZScripts.com