After Microsoft Windows OS (desktop and server) is upgraded, we can see the folder Windows.old. I agree that this folder in some cases can be very useful, but in most cases it’s only a “bed history residue” and most of us want to remove it. In the desktop operating systems is easy to do this, but in server systems seems that this functionality is missing.
So, it is not true, we just have to install it. Here is the step-by-step guide how we can do that in Windows Server 2012R2 (it is very similar in Server 2012):
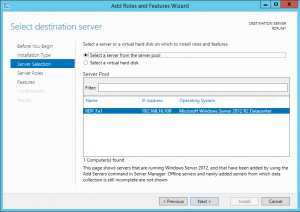
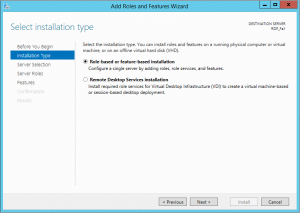
Open Server manager and in dashboard click on Add Roles and Features. On installation type select Role-Based or feature-based installation.
Select the desired server from the server pool.
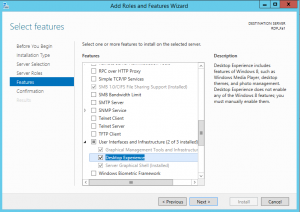
Select Next on Server Roles and in the Features step check Desktop Experience under User Interfaces and Infrastructure.
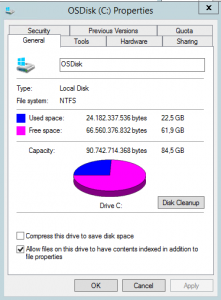
Finish the installation, reboot the server and open This PC (My computer). Right click on C disk and select Properties. Now there is the Disk Cleanup button like on desktop operating systems. Click on it.
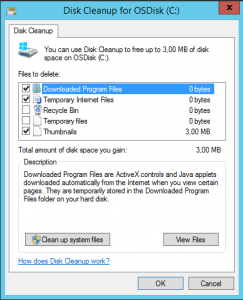
After the disk cleanup process will finish, you will be able to see a lot of file categories to clean, but there are no system files from the old installation. To discover this type of files, you have to click on Clean up system files.
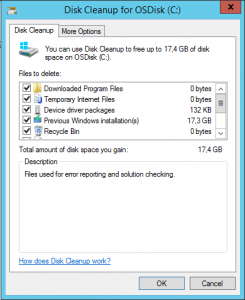
After this process will finish, you will be able to see all old windows installation files. At this point you have to select them and click on OK.
This will remove all old windows installations and system will looks clean, but before you delete old windows installations be sure, that everything is working with the new OS. After this step it is not possible to go back..
