How to change network profile with PowerShell

Many times, my customers tell me that their network don’t not work well. They have problems with access to shares, they are not able to connect via RDP to some servers and so on.
The cause of this problem is in 90% of cases a wrong network profile. This can happen if you change router, network cards or other network equipment. A small distraction when you select the network type can have big consequences by blocking many services. All of these problems have the origin in default Windows settings, as the default network profile is Public. This setting is correct because it is the optimal solution when you connect to some untrusted networks (hotels, airports…) and if we think that we travel a lot, this situation is more frequent that connecting to a new home network.
There are also many posts how to change network profile on the net. Some are better than others are, but I want to solve this problem using PowerShell. In this way it works on clients and servers, it can be done always in the same mode and you can change a profile whenever you want. It is just one command:

Get-NetConnectionProfile | Set-NetConnectionProfile –NetworkCategory Private

Network categories you can use are Private or Public. You cannot set profile to Domain.

More on Set-NetConnectionProfile can be found here..

Add Groups and Users to AD with PowerShell

When I have to manage a bigger environment, with many groups and users, I always think to PowerShell. Of course, the first step to work with PowerShell is that you have all users or groups listed in a CSV (or similar) file. The first problem for many administrators is the structure of the CSV and data needed by AD. I want to talk about this, because CSV stands for comma separated value, what means that all fields are separated by comma. Nothing strange or new, but as we know also AD structure is using commas to delaminate OU’s, domains etc. Because of this, please be careful when you create your CSV file. I prefer to create CSV file with semicolon as delimiter and then all the things are going right.
The second step that I use is to create at maximum three CSV files; one containing new AD groups, the second containing Group nesting (groups that are members of groups) and the last one containing users (Users and groups that have to be members). If you receive that data form other sources, be careful and first just test if all data are correct (if users really exist, if there is no typing error) and after this step begin with the implementation. This could be done with the same script, just delete the lines that contains write actions and export results in a test file for the future control.
Creating a CSV files: For me, the best program to create CSV files is Microsoft Excel. Everyone knows the program in the way that can type names and some data in (not all, you will have to type some attributes yourself) I always use the same structure of CSV and for this reason I never have problem with the script. Fundamentally is first line, where you have to define columns. So there are my columns:

For Groups CSV (New groups to be created):

  • Name – The name of the group
  • DisplayName – Display name of the group
  • Description – Group description (non mandatory)
  • OU – OU, where group will be created (Strucure OU=MyOU,DC=Domain,DC=com)
  • GroupType – Security or Distribution
  • Mail – E-Mail address of the group, if it will exist

For GroupMember CSV (Defines membership of Groups in groups – nesting):

  • Group – Name of the group which will have a group inside
  • Member – Name of the group which will be added as a member

For Members CSV (Define users who will be added to groups):

  • GroupName – Name of the group where users will be added
  • Member – Display Name of the user

This is all that you need. The next step is to test that Names of all users and all names are typed correctly. After you find that all data are OK, just run the scripts. I always use this order: first, I create groups, than I add groups to groups and finally I add Users into groups. This gives me certainty that I always have object that I need created previously.

The script can be downladed here:

GroupsAD.zip.

PowerShell Script for implement Mail Signature

At the beginning, we have to create a docx file. This is a normal file, containing a signature design as you want to appear and all variables from the script that you want to change (look at the end of the post for more information). This file has also to be saved on a share, where all the effected users have a read permission.
The script is written to create an Outlook signature and it is working if you have installed MS Word 2013 and MS Outlook 2013. It has been developed from a basic script on the Technet, but with additional checks and conditions as variables:

  • $SignatureVer – A version of signature – Change it when you have to deploy a new signature;
  • $UseSignOnNew – Use this signature when you send a new mail;
  • $UseSignOnReply – Use this signature when you send a mail as reply;
  • $ForceSignatureNew – Force this signature on a new mail. The user will not be able to change it (it will also force it on reply);
  • $ForceSignatureReply – Force signature on reply to mails.

Be careful because using forcing signature, will create registry values. Cancelling these settings means that you have to delete manually the registry values.

Two new registry values used by the script are introduced:

  • In the Path HKCU:’\Software\Microsoft\Office\15.0\Common\MailSettings, in the value VersionSignature, it is written a current version of the installed signature.
  • In the Path HKCU:’\Software\Microsoft\Office\15.0\Common\MailSettings, in the value ADChangeDate, it is written the date when the signature was applied.

We need both values to determinate if the company changed the version of signature and the new one has to be deployed in addition if something changed in AD user object, since the last deployment of the signature. If the AD user was changed, the user can choose if deploying the changes or not (reason / example: AD User will also change if the user changes the password and we do not deploy the new signature).
The script should be run as a logon script and it is divided into two blocks:

  1. The purpose of the first block is to determinate if the signature has to be deployed to user. Here we can see if the user already has a signature deployed and if something has changed from the last deployment. This block query AD User object and compare data from AD with local data.
  2. The second block effectually deploys the signature and for the optimization of the speed and load it run only when the script has to be deployed. It copies the docx template to local machine, changes the variables with real data and generates the signature in Outlook. To do this, the Outlook will be closed if it is open. At the end, the script writes the two registry values and delete the signature template from the local machine.

The script does not delete or effect in any other way none of the signatures that are present in Outlook. The only effect will be that, if you select, it will change the default signature on new and / or reply mails. Of course all data of the AD User object can be retrieved; you just need to found a field name in AD and associate it with variable in the script. It is pretty easy.

In my script, there are some variables that have to be present in a docx template:

  • DisplayName – Will be changed to Display value from AD
  • E-Mail – Will be changed to E-Mail value form AD
  • Title – Will be changed to Title value from AD
  • AllAddress – Will be changed to complete address from AD (street, city, CAP)
  • MobileN – Will be changed to Mobile number value from AD
  • WorkingOffice – Will be changed to Office value from AD

Of course is up to you to change these values to any other value as you wish, but be careful that values defined in script, are presented the Word template document. Only in this case the script will be able to change them.

You can download script here: Mail_Sign script.
PowerShell in Essentials Server 2012R2

For anyone who want to know and use PowerShell as much is possible, here it is a list of all commands that you can use with Server Essentials role. There are many commands and you can do almost all configurations and management from Shell. It is just a different way… and sometimes it is a better way..

PowerShell execution is paused

Not long ago and just because of a coincidence, I found something strange in PowerShell.
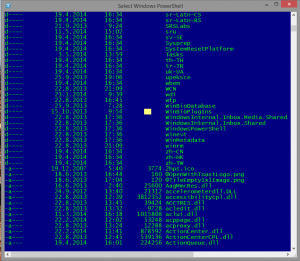
I was executing a script, but this execution took a long, long time and nothing succeeded. I was just waiting, but there wasn’t any error report and the script didn’t finish. The only thing I saw it was a selected point on the PowerShell screen.
So, what has happened? The answer is simple: when you have a selected area on the PowerShell screen, the execution of any command is paused. If you want to resume a command, just right click anywhere in PowerShell window (removing the selection). That’s all, the work will resume.
A simple trick, a simple thing that could be useful just for reading some output informations or for avoiding problems like “Why is it taking so much time to do this?”

PS1.