As you probably know, there is no real high availability scenario for the print server in Windows Server 2012R2 environment. Many times we need that in case of a single server failure, users can do their job also when situations like this happens.
In these cases, it is possible to reduce the down time of a server deploying the second print server and use DNS CNAME to publish print servers. Anyway, there are negative parts in this solution:
- DNS needs to be refreshed, so users can point to another server (consider to have short TTL on DNS record)
- there is no supported way to publish that printers in AD. Publishing printers in AD is done thru computer name (A record) and printer shared name. As we need to publish printer thru CNAME record, this is not possible. There is a workaround with ADSIEDIT and changing published name, but this is not suggested. (I will cover this in a separate post)
Whatever, you can deploy printers with GPO preferences and this is not a so difficult process. You have just to be careful that every user has mapped the right printer (this can be done with GPO preferences filtering).
To create the discussed situation, first you must to have two print servers (in our case we will name them PS1.domain.com and PS2.domain.com). On the first server, you have to install and configure all printers that you need and you can share them, but not publish them in AD. Of course it will work also publishing them in AD, but if a user will choose a printer from AD, the failover will not work for him.
After doing this, you have to create a name and a CNAME record for our print server (I will name it PrintSvr) that point on the first print server. In our example:
| CNAME | PrintSvr | PS1.domain.com | TTL = 5 min |
Keep TTL time small, because this time is critical when failover occours! Changing TTL it is not necesary if you plan to use Round robin.
With this, we can resolve our PS1 server with the name PrintSvr and you will be able to browse printers with CNAME, but if you try to install them, you will receive an error 0x00000709.
This is because we need some additional registry changes on the print server:
| HKEY_LOCAL_MACHINE\SYSTEM\CurrentControlSet\Services\LanmanServer\Parameters | ||
| DisableStrictNameChecking | QWORD | 1 |
| HKEY_LOCAL_MACHINE\SYSTEM\CurrentControlSet\Services\LanmanServer\Parameters | ||
| OptionalNames | MultiString | CNAME |
| HKEY_LOCAL_MACHINE\SYSTEM\CurrentControlSet\Control\Lsa\MSV1_0 | ||
| BackConnectionHostNames | MultiString | CNAME |
| HKEY_LOCAL_MACHINE\SYSTEM\CurrentControlSet\Control\Print | ||
| DnsOnWire | QWORD | 1 |
The first and the last registry have to be DWORD type if you have Server older than 2012R2
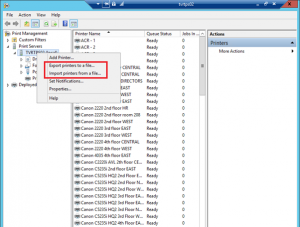
This are all the changes that you need to do. As we changed the registry, do not forget to reboot the server. When everything is completed, you can export the print server configuration from Print Management console to file. This we be useful on the second server.

On the second server, you have just to install the print server role and add the same registry values. After doing this, you can import all printers in the same way as you exported them on the first server. This will import all your printers with exactly the same names and with the same share names. So, there will not be any problem when you will switch the server. Restart the server.
Now you are ready to test the environment. Change the DNS CNAME record in the way that will point to the second server and test if printers still work (of course you can wait that TTL expire or you can flush cache of DNS servers and client where you are testing).
Good work!.
